
Congratulations, you have a Netgear LM1200 modem, a powerful tool for reliable internet. However, simply plugging it in might not give you the speeds and stability you need, especially in rural areas or buildings with poor reception. To truly unlock its capabilities, you need to go beyond the basic setup and integrate high-performance external antennas. This process can seem daunting, but it's a straightforward way to transform a weak connection into a strong, stable one.
This guide provides a step-by-step process for setting up your Netgear LM1200 with external antennas and accessories for maximum performance. Following these instructions will help you capture the best possible signal, leading to faster speeds, lower latency and fewer dropouts. We'll leverage the expertise of Campad Electronics, industry pioneers who have been optimizing mobile broadband since Australia's first 3G networks.
Why an External Antenna Setup is Crucial
The Netgear LM1200 is equipped with two TS9 ports for a reason: they are the gateway to superior performance. While the modem's internal antennas are adequate in ideal conditions, they are easily blocked by walls, roofs and insulation. An external antenna, mounted outside, bypasses these obstructions to capture a much stronger and cleaner signal directly from the cell tower. This is the single most effective upgrade you can make to your setup.
Before You Begin: Assembling Your Toolkit
To achieve the best results, you need the right components. A high-performance system is more than just a modem; it's an ecosystem of quality parts working together.
Here is what you will need:
-
Netgear LM1200 Modem: The core of your setup.
-
Nano-SIM Card: An activated SIM card from your chosen carrier (Telstra, Optus, etc.).
-
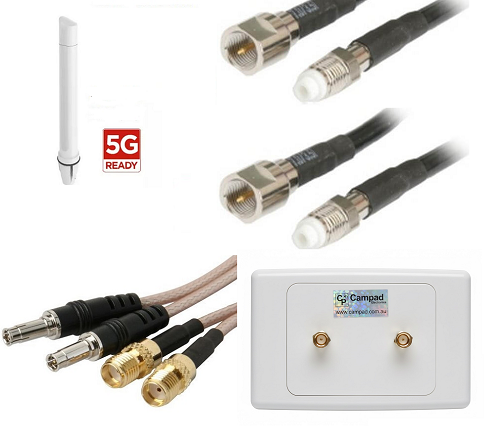
External Antenna(s): The most critical component. The type will depend on your location.
-
For Rural Areas: A High-Gain Directional Antenna Kit is best for long-distance reception.
-
For Mobile Use: A Magnetic Base Omni-Directional Antenna is ideal for caravans and vehicles.
-
For Suburban Homes: A MIMO Panel Antenna helps overcome building interference.
-
-
Low-Loss Patch Leads: This is a non-negotiable accessory. You will need a Netgear LM1200 Patch Lead to connect your antenna's SMA connector to the modem's TS9 port without losing signal quality.
-
Mounting Bracket: A sturdy Antenna Mount to secure your antenna in the optimal position.
With your toolkit assembled, it's time to begin the setup.
Step-by-Step Installation Guide
Follow these steps carefully to ensure a secure and effective installation.
Step 1: Initial Modem Setup (Indoors)
Before taking anything outside, make sure the modem is working correctly on its own.
-
Insert the SIM Card: Open the SIM card slot on the bottom of the Netgear LM1200 and insert your activated Nano-SIM card.
-
Power On: Connect the power adapter to the modem and plug it into an electrical outlet. The Power LED on the front of the modem should turn solid green.
-
Establish a Connection: The modem will automatically search for and connect to your mobile network. Wait for the Signal Strength LED to light up. It may be amber or red if you are in a poor signal area, which is what the external antenna will fix.
-
Connect a Device: Use an Ethernet cable to connect a computer to one of the LAN ports on the back of the modem. Open a web browser to confirm you have an internet connection. Don't worry if it's slow, this is just a baseline test.
Step 2: Identify the Best Antenna Position
The location of your external antenna is the most important factor for performance. Your goal is to find the spot on your property with the strongest signal and the clearest line of sight to the nearest cell tower.
-
Use a Signal-Finding App: Apps like "OpenSignal" or "CellMapper" can help you locate nearby cell towers for your carrier. The NetGear App is also useful for this.
-
Perform a "Site Survey": With your smartphone (using the same carrier as your SIM card), walk around the outside of your property, paying close attention to the signal bars. Check the roof, the gables and any high points.
-
Identify the "Hot Spot": The location with the most signal bars is where you should plan to mount your antenna. Generally, the higher, the better.
Step 3: Mount the External Antenna
Once you have identified the best location, it's time to securely mount your antenna.
-
Assemble the Antenna: Follow the manufacturer's instructions to assemble your antenna.
-
Attach the Mounting Bracket: Securely fasten the antenna to the mounting bracket. Use the hardware provided to attach the bracket to your roof, fascia or pole. Ensure it is stable and can withstand wind and weather.
-
Locate the nearest cell tower: Check coverage maps or your Telco to locate mobile phone towers near you.
-
Orient the Antenna (If Directional): If you are using a directional antenna (like a Yagi), point it in the general direction of the cell tower you identified in Step 3. You will fine-tune this later. If you have an omni-directional antenna, this step is not necessary.
Step 4: Connect the Cables
Proper cable management is key to preventing signal loss.
-
Connect Antenna to Coaxial Cable: Attach the long coaxial cable that came with your antenna kit. Ensure the connection is hand-tight, then give it a slight turn with a wrench to make it weatherproof.
-
Run the Cable: Carefully run the coaxial cable from the antenna into your home. You can run it through a wall vent, under the eaves or through a dedicated hole drilled for this purpose (be sure to seal it with silicone). Avoid kinking the cable or running it alongside electrical wiring, which can cause interference.
-
Connect the Patch Lead: Inside your home, connect the end of the long coaxial cable to your Netgear LM1200 Patch Lead. This lead adapts the antenna's larger SMA connector to the modem's smaller TS9 connectors.
-
Connect to the Modem: Gently plug the two TS9 connectors from the patch lead into the external antenna ports on the back of the Netgear LM1200. The ports are usually covered by small rubber plugs that you will need to remove.
Step 5: Fine-Tune and Optimize
Now that everything is connected, it is time to optimize the setup for maximum performance.
-
Check Signal Strength: Look at the Signal Strength LED on the front of your modem. It should now be stronger, ideally solid green, indicating a strong connection.
-
Log In to the Modem: On the computer connected to the modem, open a web browser and go to http://192.168.5.1. Log in using the credentials found on the modem's label.
-
Monitor Signal Metrics: In the modem's dashboard, find the section that shows detailed signal information (usually under "Settings" > "Network Status"). Look for metrics like RSRP (Reference Signal Received Power) and SINR (Signal to Interference plus Noise Ratio).
-
Optimize Antenna Position: If you have a directional antenna, have a second person watch the signal metrics on the screen while you slowly rotate the antenna in small increments. Wait about 30 seconds after each adjustment for the numbers to update. Your goal is to find the position that gives you the highest RSRP (a number closer to 0 is better, e.g., -80dBm is better than -100dBm) and the highest SINR (any number above 10 is good; above 20 is excellent).
-
Secure the Antenna: Once you have found the sweet spot, tighten all the bolts on your mounting bracket to lock the antenna in place.
Trust the Experts for Your Components
This setup process highlights the importance of each component working together. This is why sourcing your accessories from a specialist like Campad Electronics is so vital. With experience dating back to Australia's first 3G networks, their team understands the science of signal optimization. They provide high-quality, tested accessories that won't create a weak link in your system.
By investing in a complete, performance-matched kit from Campad Electronics, you are leveraging decades of expertise to solve your connectivity problems for good.
Ready to build a high-performance internet setup?
Check out the complete range of Netgear LM1200 antennas at Campad Electronics today!